How To Create A Github Page Using A Jekyll Theme
Summary
I spend some time finding out how to create a GitHub page using a Jekyll theme, my preferred theme is minimal mistakes. I did not want to build my blog page locally and then upload it, I prefer only to use Microsoft Code and GitHub Desktop. Spending some time figuring out how I could do that I came across a workaround. Despite there being a ton of useful posts and articles on how to create a page I did not find something to describe it step by step. So I decide my first post to describe how I created this page
Prerequisites
There are some prerequisites before starting to build out the GitHub page. I will mention them briefly,
- A GitHub account is necessary ;).
- Installed on our computer the GitHub Desktop and connect it with our GitHub account
- Installed on our computer the Microsoft Code and connect it with our GitHub account
- Basic knowledge of how to use Markdown
- Using Google ;)
Workaround
Fork the Jekyll theme we would like to use
First of all, we fork the project minimal mistakes
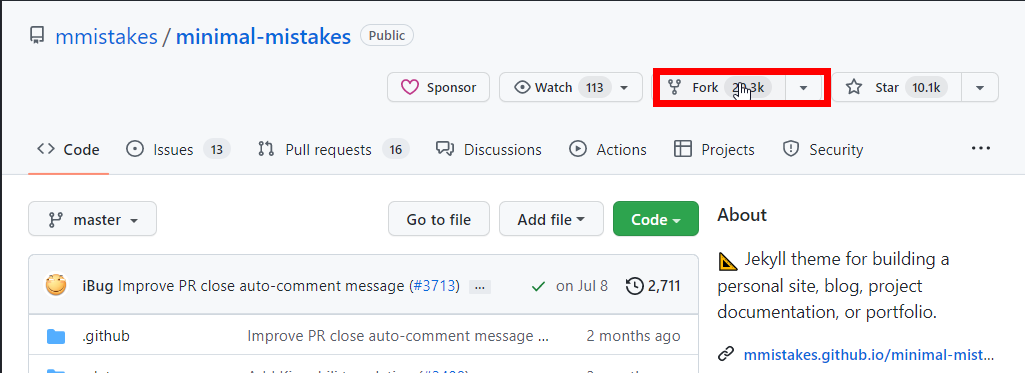
After clicking on Fork a new page will load, where we need to rename the repository from minimal mistakes with our preferred name of the personal site. The pattern of the new site is
domain name.github.io.

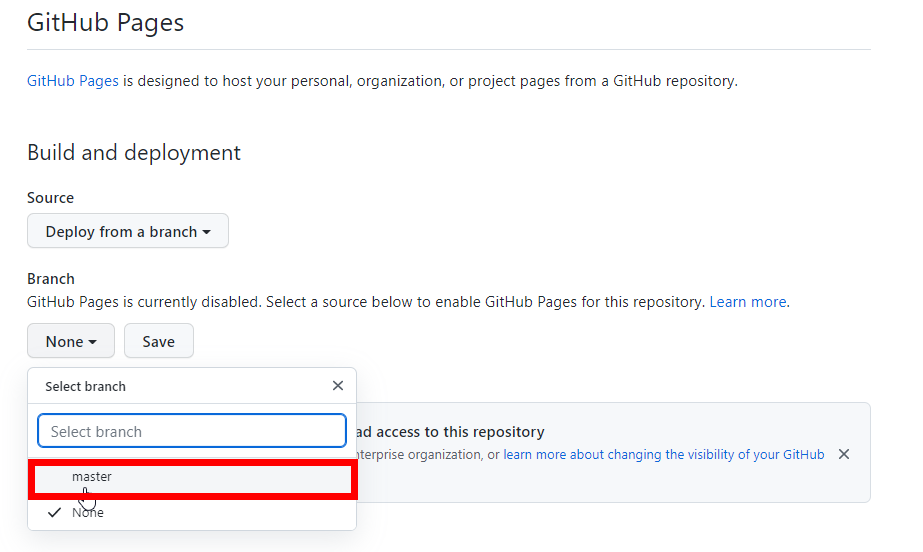
Configure the GitHub
The next steps are to find the new repository which we created and to go to Settings. There is an option for Pages where we have to do some minor changes for our site to be public.

On Pages change the Branch to Master and click Save.
After 1-2 minutes the personal page has launched and we can start to write posts or configure the page to suit our preferences.
Start Posting
Using GitHub Desktop and MS Code we can start posting articles or whatever we want. But before the start, we need to add a folder named _posts under the root directory of the branch. In this folder, we create the markdown files with the posts. More information on how to use it we can be found in the minimal mistakes quick guide